The WowRevenue Countdown timer feature is here. A sales countdown timer is a well-known sales tactic across the globe. It’s popular for increasing sales numbers of WooCommerce stores!
And we’re introducing it to WowRevenue. Here’s how it works:
If you need further assistance after reading this, please don’t hesitate to contact us. We’re always happy to help!
Create the Countdown Timer Campaign
You can checkout this video on countdown timer below 👇
To create a “Countdown Timer” campaign, follow these simple steps: from your WordPress Dashboard,
- Navigate to WowRevenue > Campaigns.
- Click on the “Create Campaign” button.
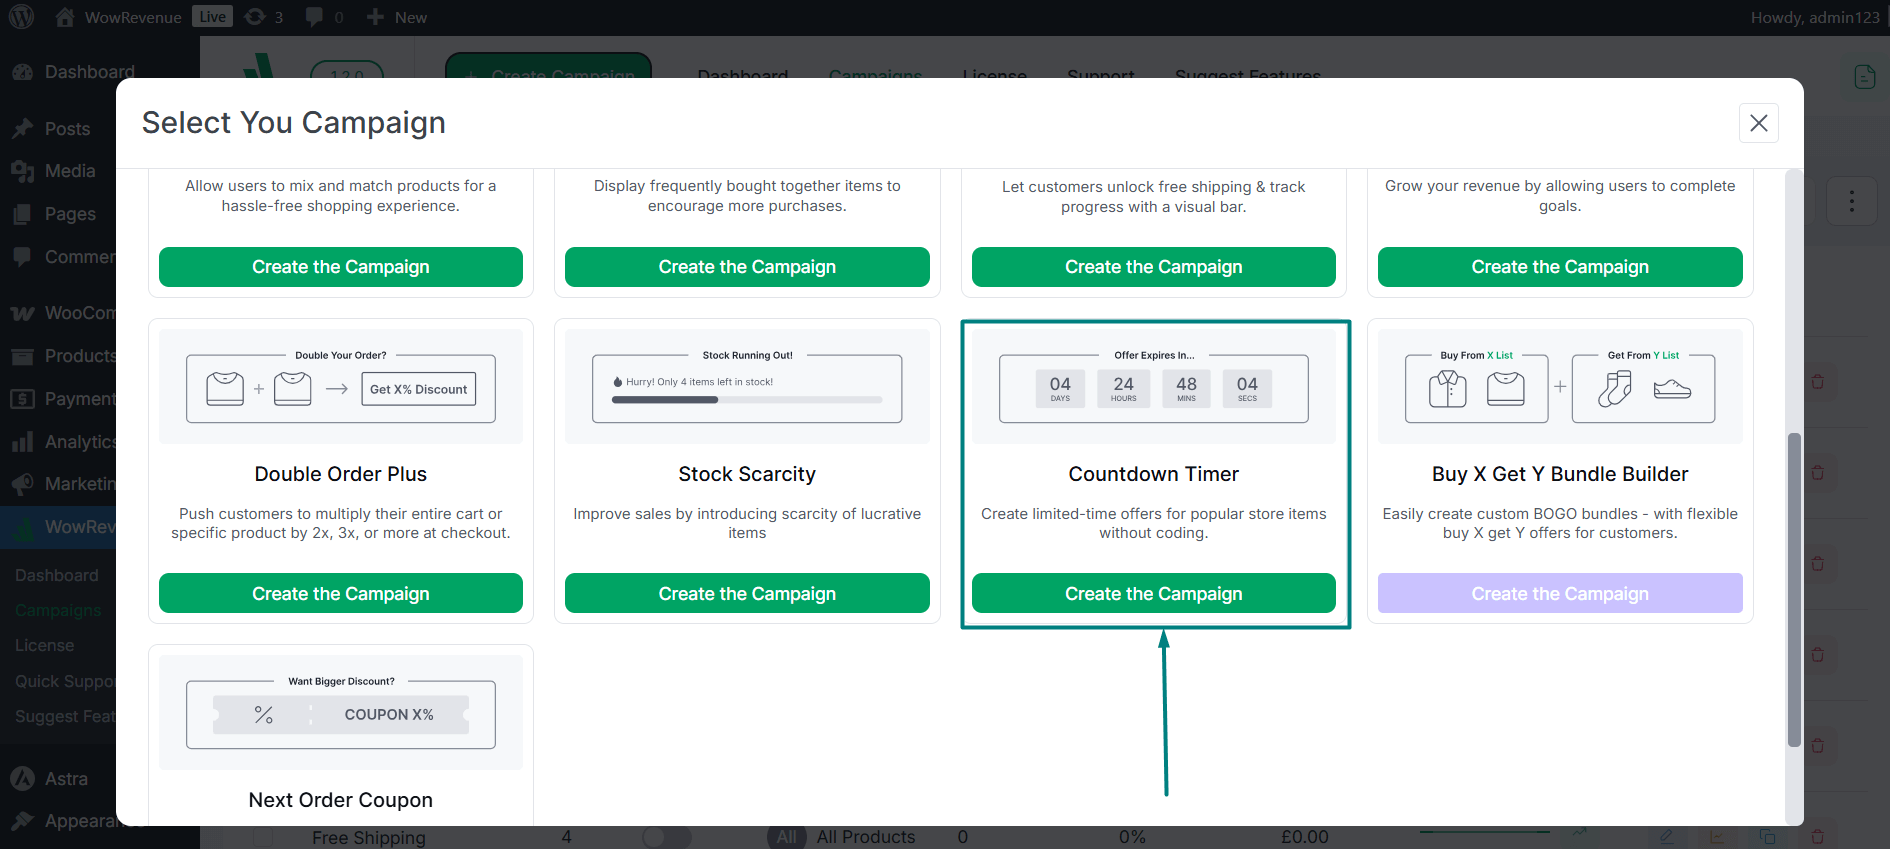
- A pop-up will appear, find and select “Countdown Timer” and then
- Click the “Create the Campaign” button to proceed.
This will initiate the process of setting up your “Countdown Timer” campaign. If you want to get a “birds eye” view of the feature – visit this link.
Initial Campaign Setup
There are a couple of things you need to do before your countdown timer campaign is ready:
Select The Pages – Where You Want the Campaign to Run
There are specific page options where you can run the campaign. The stock scarcity can currently run on:
- The Product Page
- The Cart Page
- The Shop Page and
- The Entire Site
You can set the countdown timer campaign for the pages mentioned above. Here are somethings you should note:
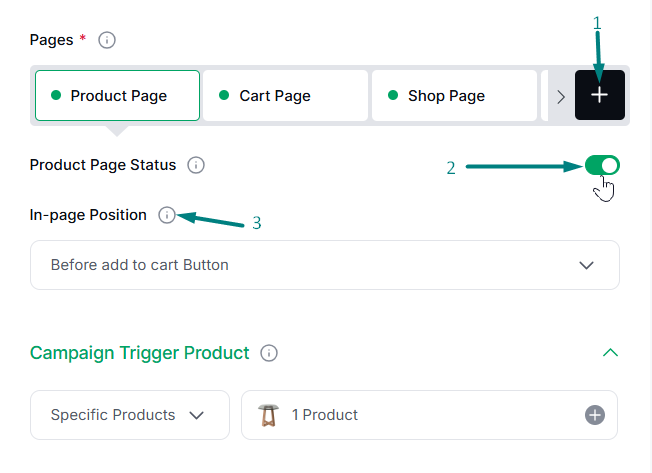
(1) To select one of the pages mentioned above, use the “+” icon
(2) Use the page status toggle to enable or disable a page
(3) Select the in-page position from the dropdown.
Please note that the in-page position for the ‘entire site’ is either at the top of the page or the bottom of the page. Also note that the appearance for the entire site will be different.
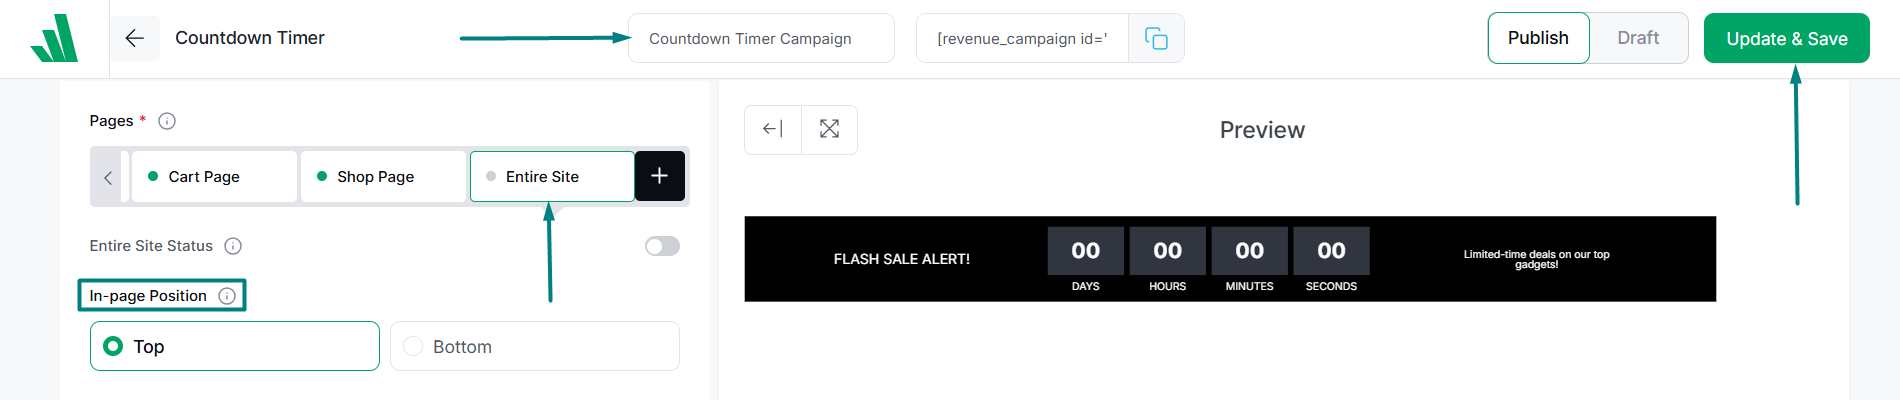
Also note that for the rest of the 3 pages, there will be different in-page positions. You can choose them from the dropdown by selecting the respective page.
Countdown Timer Trigger Product
Just like any other WowRevenue campaign, you need a trigger product for the campaign to work properly. You can set the trigger for:
- All products
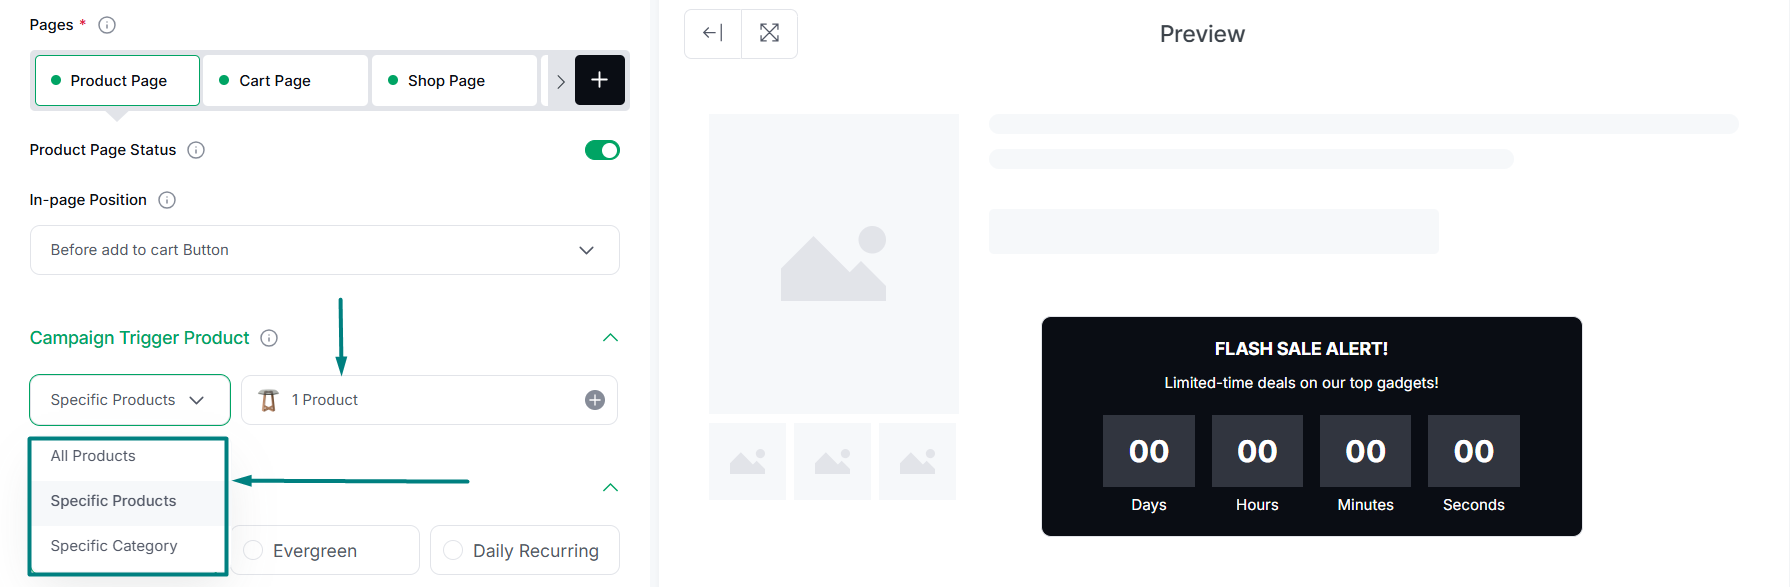
- A specific category of products or,
- A specific product
Core Campaign Settings
The timer settings are the core settings here. You will find 3 types of timers here:
Static Timer
The static timer is pretty straight-forward. You can start and end the timer at a specific date, at a specific time.
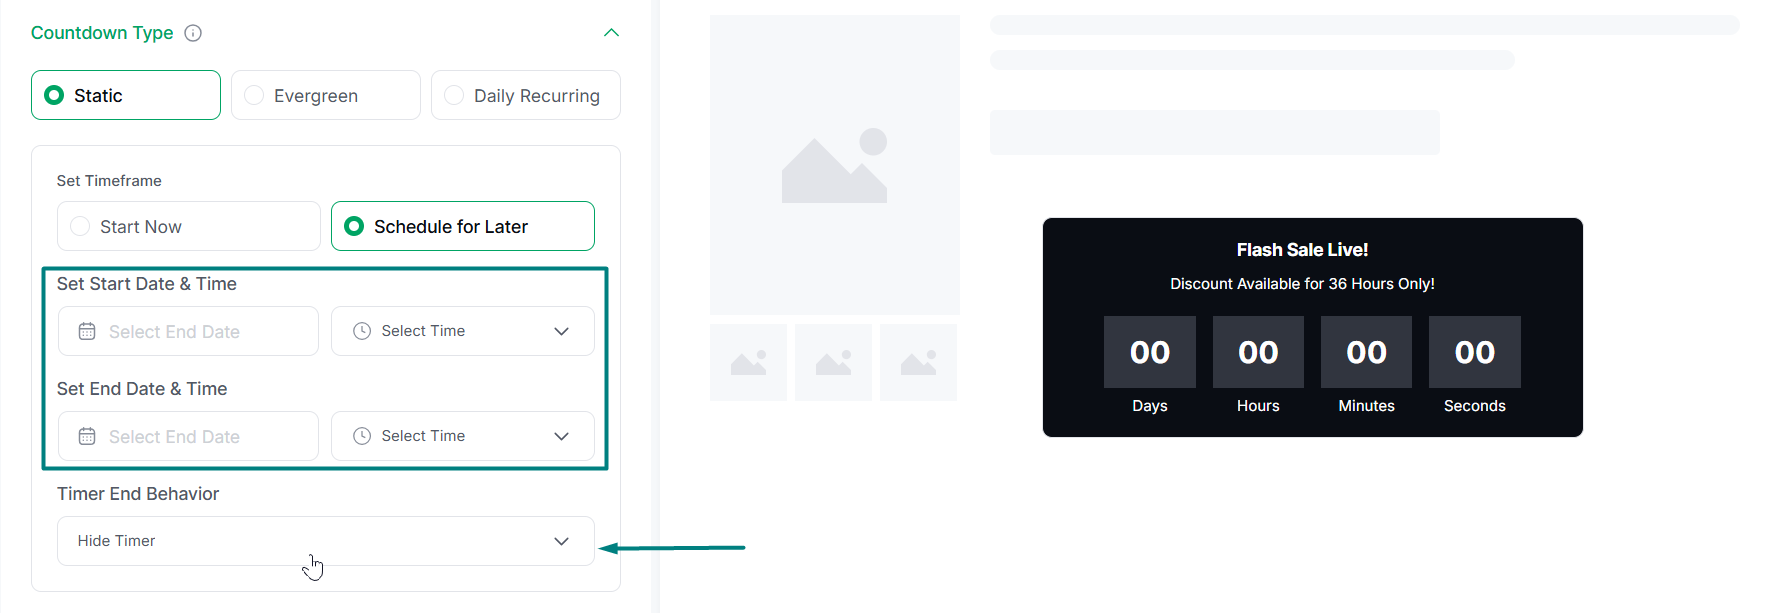
To set a static timer, all you have to do is:
- Either choose to start immediately (choose “Start Now”) or specify a specific starting and ending time (choose “Schedule for Later”)
- Set the start and end times if you plan to run it for a specific period
- Select the timer ending behavior – you can either hide the timer, or show it as it is (both options are available in the dropdown).
If you select “Start Now”, then you only need to set the end date and time.
Evergreen Timer
The evergreen timer allows you to set timings for sales in an ‘evergreen’ way. There’s a button you can use to repeat the timings as well.
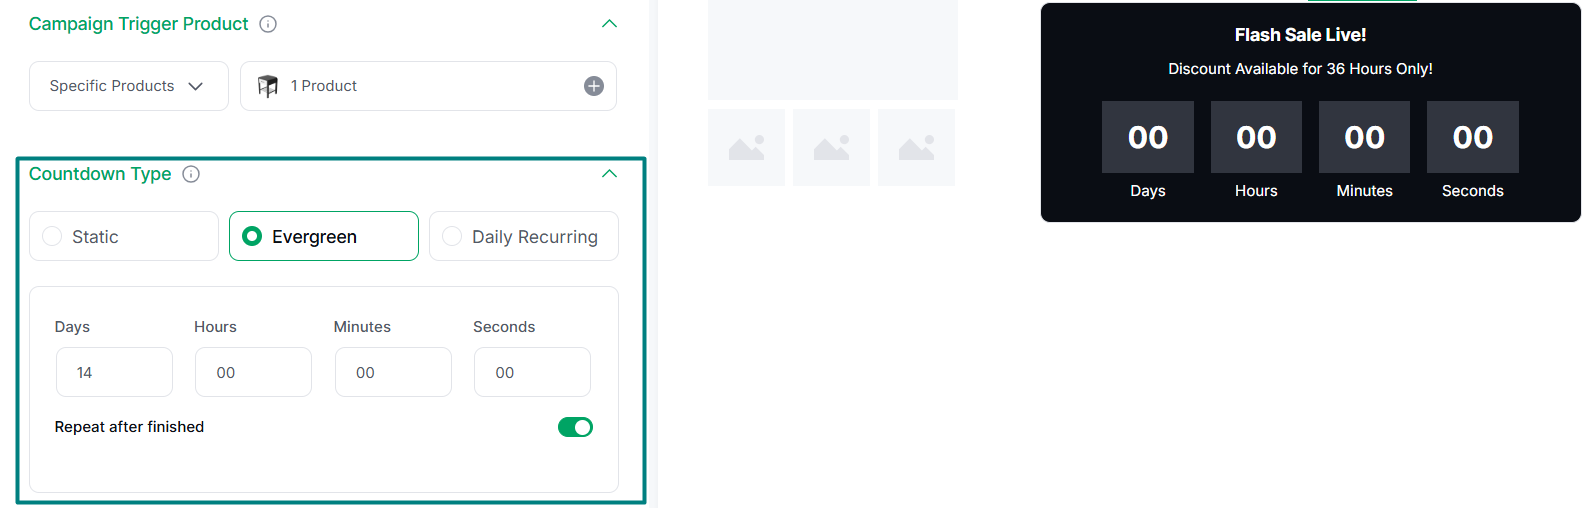
You can repeat the timer once it runs out. Simply toggle the “Repeat After Finished”
Daily Recurring Timer
The daily recurring timer requires you to set a start-time and an end-time. Based on your selection, the timer will run within the set hour.
The timer will run within the selected timeframe.
You can also set the timer for weekdays specifically. Again, you need to set the start and end timings for the weekdays.
Animated Timer
You can make the timer animated as well. It’s as simple as turning on the toggle and setting it up:
FAQ
Can I change the campaign heading and sub heading?
Yes, you can change them through the “Primary Headline” and the “Campaign Details” setting.
Can I change the appearance of the campaign?
Yes you can. From the right hand side, you can access the design settings. From the settings panel, you can access options to change the appearance of the campaign.